

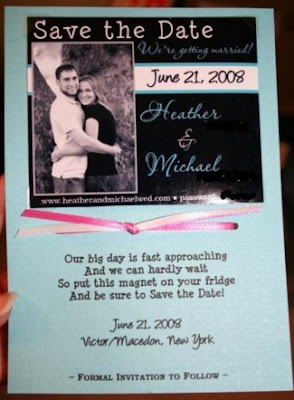
Here is a close-up of the local card with the save-the-date magnet. I attached the magnet to the card using clear photo corners. I punched holes for the ribbon, threaded the two different colors through together, and then tied them together in a flat ribbon knot.
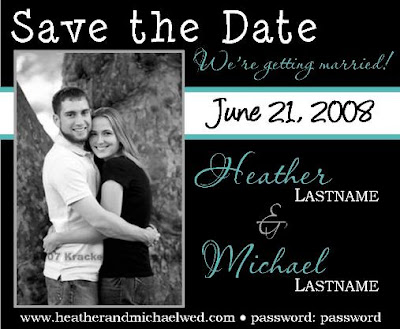
This is the digital mock-up of our save-the-date magnet that is "internet safe." I took out our last names, but wanted to show how they appeared on the actual magnet, so I replaced them with "Lastname." I also replaced our real password with "password." The photo shown is also the proof photo, so it's not as high quality as the one we used for the real thing.
I'm really happy how they turned out. Hopefully everyone will enjoy getting them in the mail, and they'll serve as a little reminder of our date.
Since I DIY'd the magnets instead of ordering them from a place like www.magnetstreet.com (I absolutely LOVE their stuff, but wasn't willing to pay that much for it!), our save-the-dates were really inexpensive. Here is a list of the supplies I bought and a brief description of how I made them.
SUPPLY LIST AND COST:
- Aqua blue cardstock (8.5" x 11" sheets) - I bought 36 sheets to make 72 save-the-dates. I bought them on sale at Joann Fabrics for 6 for $1, so the paper only cost $6.
- Photo corners (2 boxes) - $4
- Ribbon (3 spools hot pink, 3 spools white) - $0.50 each, so $3 total
- Adhesive magnet sheets, 1 package of 12 sheets (it said 8.5" x 11", but they ended up being something like 8" x 10.5"), purchased from Oriental Trading Company - $16.90
- HP Premium Plus Photo Paper (8.5" x 11") - We bought this on sale at Circuit City, buy one package get one free, so we got a great deal on it. I think it was like $25 total, but we got two packages, one of the 8.5 x 11" sheets that we needed for this, and another of 4x6" that we use on a regular basis. So each package works out to be approx. $12.50, and we only used 12 sheets out of the 25 in the package. So half of that = $6.25
- Stardream Quartz Envelopes (A7 size) - These are the envelopes we're using for our invitations, and with the package sizes, we had to order extras. I specifically designed the save-the-dates to fit into these envelopes so we could use the extras. So I don't really look at the envelopes as costing me anything for the save-the-dates, since I had to buy them anyway. But if you do want to include that cost--$19.44 for the 72 envelopes.
So, the total for all of the supplies is $55.59. Divide that by 72, and you get $0.77 each. Not bad at all. At least not in my mind. They did cost $0.58 each for postage (the magnet makes them a little heavy), too, so keep that in mind, but we handed out as many of them as we could to save us some of that cost.
BRIEF INSTRUCTIONS:
1) I started by cutting all of my cardstock. I cut each piece to be 5" x 7" so they would fit well into the A7 envelopes.
2) I designed the magnet, and the text for the blue card, in Microsoft Publisher. I designed the magnets to fit 6 on a page. Then, I printed them BORDERLESS on the 8.5" x 11" photo paper using my HP inkjet printer. I printed the blue cards by running them through the inkjet printer as well, on a borderless setting for a 5" x 7" piece of paper.
3) I cut the photo paper using my paper cutter, and went into work on a Saturday to use the heavy-duty paper cutter to cut the magnet sheets into six pieces per page as well. Then, I peeled the backing off of the magnets and stuck each of them to one of the photos I had printed.
4) I attached each of the magnets to the printed blue cards with clear photo corners. Then, I punched two holes (using my 1/8" hole puncher) into the card. Then I cut the ribbon into 12" pieces, and threaded the two colors through the holes together. Then I tied a flat ribbon knot.
5) I used an aqua blue sharpie to address all of the Stardream Quartz envelopes.
Done!


2 comments:
I love them!! They look fantastic, Im also DIY most of my wedding stuff. Ive already bought the STD materials, now Im working on finding some kind of software to design the magnet. I dont have microsoft publisher. Any other recommendations?
What font did you use for the STD's? Thanks
Post a Comment