Looking for me?

Still interested in keeping up with me and my life "after the aisle"?
Come visit me on my new blog, Heather Drive. I hope to see you all on the other side!
Showing posts with label invitations. Show all posts

Wednesday, April 23, 2008

Prices - Aisle Runners, Banners, etc.

As you all know, I complete projects for other brides. Aisle runners, banners, photo frame cardboxes, invitations, save-the-date design, jewelry, and more. Pretty much any wedding project you can think of--I'm probably willing to do it.

The time has come for me to finally post some pricing information on my blog. I simply can no longer keep up with so many e-mails, and honestly, I'm not sure why I didn't do this sooner.

I'm hoping to get some kind of "store" page or website up at some point, but it's not looking likely that I'll have time before the wedding. So for now, I'm going to post answers to the most frequently asked questions I get in my e-mails (regarding pricing and the projects I do for others).

Prices included below are current as of today, 4/23/08. If I make changes, I'll post updates.

1. How much do you charge for the monogram aisle runners? What colors/designs do you offer?
With the aisle runner itself included, I charge $80. Both aisle runners that I can buy locally are white. One is a "floral lace" pattern (seen here for Bridgit & Scott), and a "daisy floral" pattern (seen here, for Carrie & Paul).

The price includes the rest of the supplies I need (paint, paper, etc.), and my time. I have access to a wide variety of paint colors. If you're trying to match a specific color, I'll work with you to try to find the best match possible. It's helpful to e-mail me reference photos--bridesmaid dresses, "virtual swatches," etc. Or, I've had brides mail me actual samples, whether it's a piece of the bridesmaid dress, or one of their invitations.

If you are not fond of the floral lace or daisy floral patterns, you can find your own runner (it HAS to be fabric--no plastic--and have it shipped to me to paint. In that case, I charge $55-$60 for my services.

At the time of purchase, the runners are 100 ft. long. If your aisle is shorter, I will gladly custom cut the runner to the desired length.

If you do not already have a monogram designed, and would like me to make one for you prior to painting it on the runner, see information about monogram pricing below.

Shipping is additional. I charge whatever it costs to ship it to you. The cost is completely dependent on where you live, and how long the runner is (it affects the weight of the package--longer runner = heavier). I use USPS Priority Mail and FedEx. I can provide you with an estimate for shipping if you provide me with your zip code. Shipping insurance is optional, but highly recommended. I will calculate shipping insurance prior to billing you, and will let you know how much it is (usually $1.65-$2.00). If you are outside of the United States, let me know and we can look into all the shipping options.

2. How much are monogram banners? Bride banners?
Banners are $45, which includes the ribbon edging, dowels, and the painting. If you order a bride banner, I will send you a file with your font choices. The ribbon edging and the paint color can be customized to your needs. Ribbon colors can be limited--but I have never had a problem finding something that works.

If you would like a monogram banner, do not yet have a monogram, and would like me to design one for you, please see the monogram pricing below.

Shipping is additional. Same rules apply as mentioned in the aisle runner section above. All banners can be shipped via USPS. Shipping insurance (which is optional, but highly recommended) is a flat $1.65 fee.

3. How much is monogram design?
Monogram design is $10. The price includes several different customized monogram designs for you to choose from. I will also make small tweaks to the monograms upon request. Once the monogram is finalized, I send you the high-resolution JPEG file so you can use it on pretty much anything you'd like.

4. How much do you charge for save-the-date design?
Many brides choose to have magnets or postcards made through VistaPrint. I can be hired to design the layout for those magnets or postcards for $30. For other save-the-date formats, e-mail me and I'll provide you with a custom quote.

5. How much for cardboxes, invitations, jewelry, and everything else?
All other projects require custom pricing. It is impossible for me to provide a flat fee for these because each person's project is so different. For the cardboxes, it depends on the person's preference for the fabric on top, the type and size of frames, etc. For invitations, it depends on style, paper preference, envelopes, number of invitations, whether you want me to assemble them, etc. Jewelry prices depend on the cost of the supplies and the intricacy of the piece.

6. Do you make ______ for other people?
E-mail me. I'm pretty crafty, so chances are that if you've seen something out there--I can make it.

7. How do you accept payment?
I accept payment ONLY through Paypal. If you don't already have one, an account is free and very simple to set up. I find that Paypal is the fastest, easiest, and most secure way for us to do business together.

8. How long does it take to complete my order?
Right now, this varies. I try to complete all projects within eight weeks of ordering. Right now, since I'm on a little hiatus for my own wedding (I'm not accepting any new orders for April, May, June, or July 2008 weddings), I'm not planning to complete any projects until July. If I think it will take longer than eight weeks, I will always let you know and keep you posted. Also, I do not charge you until I am ready to start working on your order--so there is no risk associated with me "holding onto" your money.

Interested? Want to move forward with ordering? Have more questions?
Please e-mail me at roadtotheaisle@gmail.com

Want examples of my work?
I post almost everything on the blog! Browse around. I hope you like what you see.

Thursday, April 17, 2008

First RSVPs!

We received our first RSVPs in the mail today. Five of them!

Ever since we mailed them on Monday, I've been really excited to start getting the response cards back. But I didn't realize how excited I was until I opened up the mailbox and saw five aqua cards piled high. I think I nearly squealed.

Pathetic, I know.

Michael was still at work so I instant messaged him to make sure it was OK with him that I opened them without him. I didn't think he'd care at all, but after asking, I got the feeling he actually would have preferred that I wait for him. Since he wasn't getting home until after 7:00 tonight, he told me to go ahead. Two seconds later, the phone was ringing and it was him, wanting me to open them while he was on the phone with me. Too funny.

Anyway, we got 10 yes responses and 1 no. She actually has a really good excuse. She's due with her baby on June 10. With the wedding on June 21, she's either going to be miserably late, or she's going to be a brand new mommy. Her boyfriend (baby's father) is coming, however. He is a really good friend of Michael's. So no surprises so far.

Most popular meal choice of the day? Chicken marsala.

Can't wait to see what the mailman brings tomorrow!

Tuesday, April 15, 2008

For Keeps

I've seen a framed wedding invitation in just about every house I've been in--at least those of married couples. Because our invitations are not of the regular "card" variety, I kind of figured maybe we wouldn't frame an invitation at all. But over the weekend, it hit me. The perfect solution: a shadow box.

I went to Michael's after work yesterday and bought a shadow box (regularly $24.99, but I had a 50% off coupon, so $12.50). I went home and put together a little invitation display. I'm quite happy with how it turned out. I had to trim the pocketfold flap a little bit to get it to fit into the box, but you can barely even tell.

Now we just have to figure out where we want to hang it up.

Monday, April 14, 2008

And... they're off!

Invitations officially went in the mail this morning. I stopped by the post on the way into work. I thought I had given myself plenty of time, but there were already like seven people in line when I got there at 8:05. I neglected to think that there would be major procrastinators there... trying to get their taxes out in time! Annoying.

I waited in the line anyway. I wanted to 1) see if they would allow me to hand cancel them (which they didn't), 2) have them double check the weight and the postage (definitely didn't want 100 invitations returned to us for insufficient postage), and 3) find out how much postage to put on my cousin's invite, which had to go to South Korea.

After 25 minutes waiting in line, they were gone and I was on my way out of the post office empty-handed. I have to admit: Even though I was totally relieved to finally have them done and out of our house, I was also a little bit sad. I guess it was bittersweet. But I'm over it--now we're looking forward to getting the RSVPs back!

This is me last night after they were all officially assembled, stamped, and packed to go to the post office:

The invitations in my front seat this morning:

And into USPS they go...

I hope they get to everyone unscathed. I have nightmares about them arriving to the guests completely destroyed. I just spent SO much time on them, I would absolutely die if they turn out like crap by the time they get to the people they were intended for. We'll see what happens! People locally should receive them tomorrow!

Sunday, April 13, 2008

DIY Invitations - A Cost Analysis

I've had people ask me about how much it cost to make my invitations. I never really had time to figure it out, but now that they're almost done, I think it's probably time to find out what these puppies cost us.

Some of these amounts are just really good estimates--I didn't save every receipt for every ink pad, tape runner, etc. so I just went with what I know they cost and estimated the total. Also, for some things--like envelopes, paper, etc.--I ordered more than I needed. Because I'll end up being able to use the extra for other projects, I didn't think it was fair to include those in the cost. So for some things, like a big pack of paper, I divided the total cost of it by 250 (the number of sheets in the pack), and then multiplied that cost by the number of sheets I used. Hopefully that makes sense.

Here is the cost breakdown:

  • Invitation Envelopes-A7 & RSVP Envelopes-4Bar (Envelopemall.com): $49.83
  • Astrobright Glisten-Lunar Blue Cover Weight Paper for Pocketfolds (Anchorpaper.com): $29.93 (Note: I actually paid $41.44 for the paper I ordered--130 sheets. However, I was actually sent around 180 sheets, which I'll be able to use for programs, so I cut the cost of that down accordingly).
  • Stardream Aquamarine Cover Weight Paper for Invite Backing (Anchorpaper.com): $14.30 (Again, I have quite a bit of extra, but I'm not sure what else I'll be able to use it for--so I counted the full amount)
  • Classic Linen Recycled Bright White Paper for Invitations and Inserts (Anchorpaper.com): $35.13
  • Shipping for All Paper Products (Anchorpaper.com): $14.02
  • Super Tacky Tape, 9 rolls (PaperSource.com): $39.15
  • Ribbon for Belly Bands, 2 rolls (Save-on-Crafts.com): $16.36
  • Flower Stamp (Ebay Seller): $7.20
  • Custom Address Stamp (Rubberstamps.net): $14.90
  • Ink Pads and Embossing Powder, 3 of each (Michael's, Joann Fabrics): $21.00
  • Embossing Buddy (Michael's): $4.00
  • Professional Cutting Services (Copy Center at Work): $16.00
  • AdTech Permanent Tape Runner Refills, 4 Double Packs (Michael's): $8.50
  • USPS Postage for 100 Invitations and RSVPs: $99.00 (Note: 58 cents to mail invitations, 41 cents for RSVPs)

This brings the grand total to: $369.32 for 130 invitations (I only purchased postage for and mailed 100 of them so far. I made a LOT of extras--probably too many)

=$3.07 per invite WITH postage

Removing postage from the total = $270.32 for 130 invitations

=$2.08 per invite WITHOUT postage

Obviously, invitations can be done for much cheaper. But I really wanted something that was made especially for us, BY me. And all in all, I think that's a pretty good price for pocketfold invitations.

One thing that definitely needs to be considered is time. I did not keep track of how many hours I spent making these things... and I'm glad I didn't, because it would probably be staggering. They took a really, really long time. There's no doubt about that. Luckily, I was able to break up the process over several weeks and months, so it wasn't so bad. But you definitely have to be committed to being in this project for the long haul if you want to DIY your invitations in this fashion. For me, it was worth it because I love the finished product and they feel like they are completely and totally mine. But just be warned.

I hope this helps someone!

Friday, April 11, 2008

They're ready for their close-up

My pride. My joy. My blood, sweat, and tears. *Big sigh*

My invitations.

They're beautiful, if I do say so myself. Though like any mother with a child, I tend to be biased.

OK, seriously. Invitations? Obviously not a child. But from the amount of work I put into them, it certainly feels like it sometimes. I have about 60 of them completely assembled, sealed, and ready to go out. I'll be finishing the rest this weekend and they will go out on Monday. You'll see!

In the meantime, enjoy photos of the finished product. Oh, and that's our newly finished, beautiful floor being used as a backdrop. With natural light coming in through our newly installed sliding glass door. Life is good.


Tuesday, April 8, 2008

Next Step: Assembly

With the completion of the belly bands last night, all is now ready for assembly.

I got started with some of them tonight. I did about 20 of them. I'm going to need a lot more adhesive tape than I originally thought. I already went to Michael's tonight to pick up an extra two-pack. I only got about 20 invites out of one roll. So I figure I have another 20 to do before I run out. Lovely.

T minus 6 days until they go out!

Monday, April 7, 2008

Belly Bands

After a ridiculous amount of hours spent making them, I finally finished all of the belly bands tonight. It's a good thing, too... because I swear, those last 20 of them, I was ready to just throw everything away and forget this DIY invitation stuff. I knew I was so close to being done, but they just were soooo tedious. For some reason, I couldn't stop though. I had 40 left to do, and I just had to get them done tonight.

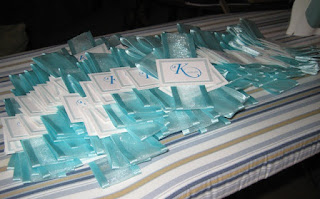
So here they all are, in all their glory:


I made all of the belly bands by cutting the ribbon to length (about 11" to wrap around my pocketfold). I had a throw-away pocketfold mock-up that I was using as a "template" for the ribbon.

I wrapped each piece of ribbon around the template, and then ironed down the edges to make creases on either side of the pocketfold. Since the ribbon I'm using isn't wired, I found that ironing the edges helped make it better fit the pocketfold. Side note: I put a pillowcase over the ribbon before ironing it. I didn't want to damage it.

Then I attached the two ends of the ribbon together by pulling it tightly and securing it with two glue dots. After that, I used four glue dots to attach the monogram seals. Once complete, I slid the belly band off the end of the template and ironed each fold for like 5-10 more seconds just to make sure the crease was really good.

So with that, it is official: All individual components of the invitations are done. Now all that's left is assembly. The sense of accomplishment (already) is immense. I can only imagine what it'll feel like when I can drop these bad boys in the mail next week.

Friday, April 4, 2008

The Seals

Tonight, I finished the seals for the outside of the pocketfold invitations. These will be used to cover the seam in the ribbon belly band.

These are made with just different size pieces of paper layered on top of each other. I measured and cut them all using my Fiskars rotary cutter. Then I glued them together using a regular adhesive tape runner I have that I bought a long time ago at Michael's. I used almost two refills of the tape just to do these. There are cheaper ways of doing it (rubber cement, elmer's, etc.) but with so many little pieces, I think the tape runner is the way to go.

One more task off the list of invitation preparation...

Wednesday, April 2, 2008

Invitation Station

I'm eating, breathing, sleeping invitations.

Today I printed all of the seals for the outside of the pocketfold. I also cut them, but I still need to cut the other two layers of the seal. These are the only things I'm cutting myself, thank goodness. Once all the layers are cut, I have to adhere them all to each other.

After that, I need to make all of the ribbon belly bands. Ugh.

I still need to print all the RSVP cards (each one is personalized), and I need to take those into work to get them cut, too.

Last night, I did MORE stamping. And MORE embossing. I'm getting so sick of it but I know I'm almost there, I'm almost done... and then I get to assemble.

Almost all the envelopes are addressed already; I just need to do the ones for which we were missing addresses.

These things are truly a labor of love. And I'll be so happy when they finally fly on their own and hit the trail to their respective recipients' mailboxes.

Ahhh... that'll be the day.

And that day is April 14. Let the countdown begin.

Sunday, March 30, 2008

Erynne & Ian

I'm still going strong with the projects. I have several to share, but I am going to save a few for tomorrow or later this week. I have five more that I still owe to people (before our wedding).

I'm obviously not going to meet my goal to have them all done by the end of March, but I'm OK with it. I don't feel overwhelmed by them at all. They're all projects I know I can handle. For the past couple of weeks, I have been concentrating on a combination of the banner/runner projects and my own wedding projects. I've struck a good balance and I've been pretty productive on both fronts.

Our invitations are going out two weeks from tomorrow... so I'll likely be working on those a lot over the next couple of weeks. Once those are mailed, I'll have another little lull (or at least, I hope I will) and I'll be able to complete any remaining projects shortly after that.

Anyway, here are two recent projects. I was able to finally put the finishing touches on the banner today, so I'm ready to share. Erynne ordered both a monogram banner and a monogram aisle runner. I designed the monogram for her and her fiance, Ian. And then I got to paint it... twice!

This is a case where my camera doesn't do the projects justice. Because they are lighter colors, they get washed out easily by the camera. In person, they are still soft colors, but they are better seen than in these pictures.


Love the combination of light pink and sage green. While I was painting these, I was thinking about how chocolate brown would also be a nice coordinating color for a palette like this.

Erynne, I'm still working out issues with USPS sending me my shipping boxes. But these should both go out to you in the next couple of weeks.

Thursday, March 20, 2008

Shower Invitations

It's a long story, but it came about that I ended up designing and making my own shower invitations.

I actually had a lot of fun with it--once I figured out what I wanted to do and came up with a design I was happy with. And they turned out so cute! I love them. So in the end, I wouldn't have had it any other way. I'm the DIY paper guru, so it only makes sense that I would have a hand in all things paper.

Here is one of the finished invitations (with some important stuff blurred out for privacy, of course):

It was difficult to take a photo with flash that didn't wash them out, but you get the idea. I actually ran the envelopes through the printer, too, which I also designed to have a few polka dots on the front left side.

These are going out in the mail tomorrow for my April 19 shower. So exciting!

Monday, March 17, 2008

Pause

Can we just pause for a moment and stand in awe at the number that appears next to "March" over there to the right? You know, the post numbers... over there. --->

Oh, and let me remind you. It's only March 17.

I've been one hell of a dedicated blogger lately! I wish I hadn't missed the first of the month... I'd be going for a perfect record. Ah well. Still doing really well for me.

Not too much going on today. My tax return was deposited into my bank account this morning. That certainly feels good. I love tax returns! I'm going to transfer it over to my high-interest savings account and let it gather some interest until we need it.

Yesterday, I stamped the flower onto all of the our invitation envelopes, which officially completes those. Now I just need to address them. I brought them to work with me this morning and figure I'll spend some time addressing them on my lunch breaks this week.

Other than that, I'm still cranking away at my projects--still have a few monogram banners and aisle runners to finish in the next couple of weeks. I'm anxious to finish them because I feel like it will be a huge relief. Then I can go on to... stress about other things. :)

Thursday, March 13, 2008

100 Days

We are officially at 100 days. It's one of those magic numbers; those milestones that seem to make things way too real. Tomorrow, we'll be in the double digits.

Holy crap.

I remember back in college (I can't believe it was four years ago already), there was a "100 Days Until Graduation" happy hour for all seniors. Of course, given that graduation was in May, the 100 days was sometime in January or February, but what I remember most about that whole experience was that we celebrated 100 days and then BOOM. Graduation was there, in what seemed like a blink of an eye. And then it was over.

I'm anticipating a similar freefall for the wedding.

We have a lot left to do, but at this point, I am feeling confident about the progress. I'm really on a roll with the invitations right now. I'm "in the mood" to work on them, so basically every night I am doing something different for them. On Tuesday night, I spent about three hours making a wedding map to fit on a "Map & Directions" insert. Fun, fun.

We ended up making some changes to our invitations--we're not going to include a "Sunday Brunch" insert because we don't want to invite EVERYONE to my mom's house the morning after the wedding, and including it for some people but not others was getting too complicated. So we decided we will send out separate Sunday Brunch invitations at a later time, and it left me another insert to play with. So "Accommodations & Directions" was split into "Map & Directions" and "Accommodations."

Yesterday, I took our newly-designed and printed "Map & Directions" cards downstairs to the copy center at work to have them cut. Today, I plan to take both the "Accommodations" and "Reception" cards for cutting as well. I'm waiting on a few more last names of significant others, or more specifically, I'm waiting for a certain someone (*clearing throat* Michael!) to text/call his friends to get those last names. I need them before I can print our super-duper, redesigned, totally anal RSVP cards. They're awesome, if I do say so myself.

Last night, I stamped our return address on the back of all of the invitation envelopes.

Progress, people. It's progress!

Tomorrow night, I think we are going to finally meet with another videographer. I am really praying that he is everything we're looking for because with just a little over three months to go, this is something that really needs to be booked. Like, yesterday. I just have this vision in my head of what I want it to be, and a price that we want it to be under, and I really, really want this guy to be the answer to all of that. Let's hope.

Wednesday, March 12, 2008

Damn you, USPS

This is what $99 worth of postage looks like.


It is completely unfortunate that I learned what it felt like to drop that much money at the post office. $99 for something so completely intangible... but oh well. I guess I should count my blessings at this point that it's not more--here's hoping that the $0.58 stamps are actually enough to mail the pocketfold invitations. The last time I put together a complete mock-up and weighed it, it was just under 2.0 oz., which is the limit for the $0.58 cent postage. Let's hope it stays that way!

I'd also like to file a complaint with USPS about changing the postage rate right in the middle of my RSVP timeframe. Thanks a lot, bitches. That extra cent is really worth the trouble for you? Really??

If I remember correctly, the postage increase will take effect on May 15. Our RSVP deadline is May 21. And of course there are always stragglers. So we had to go with the "Forever" $0.41-cent stamps for our response cards. Ugly? Yes. But you know... we have aquamarine RSVP envelopes, so the purple wedding heart stamps would have clashed anyway.

That's me, looking at the bright side.

Monday, March 10, 2008

Embossing Queen

I have officially started the monstrous task of stamping and embossing our invitations. The invitation portion is the only thing we have printed and cut so far, so I started those on Thursday night. I only did about 36 of them before I called it quits and headed to bed.

On Friday night, I finished them. I don't know what got into me, but I got into a rhythm and it really wasn't that bad. I actually had a little bit of--dare I say it--fun.


Early last week, I ordered a custom return address stamp from rubberstamps.net. I'm very impressed with their service. I wanted to use the font (Californian) that we have been using on our invitations and inserts, so I "designed" the stamp in Microsoft Publisher, saved it as a JPEG, and then uploaded it to rubberstamps.net. The stamp cost $11.95 + shipping (only a couple of bucks), and it was waiting for me in my mailbox in only a few days. The turnaround time was great.

Last night, I decided I wanted to give the address stamp a try, so I sat down to start stamping/embossing our RSVP envelopes. Well, once I started, I just couldn't stop. I finished all of them, too.

I'm feeling really good about my progress right now. I feel like every day, I'm accomplishing something else and getting myself one step closer to completion. Thank God.

For the invitations, I still have to do the following:

- Finalize design of inserts and RSVP card

- Print inserts and RSVP cards, have them cut

- Stamp/emboss all inserts and RSVP cards

- Stamp/emboss return address on invitation envelopes

- Print, cut, and glue all of the squares for the belly bands

- Cut ribbon for belly bands

- Address invitations

- Buy postage (for invitations and RSVPs), affix postage

- Assemble, stuff, and seal!

As the list above shows, I still have quite a way to go. But the important thing is that I'm getting there. Ideally, I want to send the invitations out the Monday before my bridal shower, which is on Saturday, April 19. Five weeks to go!

Friday, March 7, 2008

Updates on past posts

I realize that sometimes I post about things that are unresolved and then I never post how they turn out. Whoops. Sometimes I get comments asking about them, so I figured I should go back to some open-ended posts and provide updates on some things.

I get questions a lot regarding my adhesive tape situation with my invitations back in November. People write in saying they have the same problem, and ask what I ended up doing to resolve it. Well, the answer is... I answered that question on the blog back in December! So there, I am pointing you in the direction of the answer. :)

Following up to a videographer post back in January... we still have not booked a videographer. We met with one last month, but he wasn't exactly what I am looking for, and his prices were a bit high. We haven't given him a definitive "no" yet, but we want to meet with other people. I just talked to another guy today, and we'll hopefully be meeting with him in the next week or so. I'm crossing my fingers--this is one that we need to resolve quickly.

These shoes did not work out. They were just not comfortable enough, and as you can see from the photo--they offer no support whatsoever. I'd be better off going barefoot than to wear those things. I ended up ordering three more pairs of shoes from endless.com, but alas, those did not work out either. Thank goodness for free return shipping. I'm still on the hunt for the perfect sandals/flip-flops. I am eyeing a really sporty looking pair--my mom was sort of appalled, but at this point, I just really don't care. Something like these:

I know they are ridiculous, and totally non-bridal (dare I say TACKY?), but what the hell. I just want something comfortable, no one is going to see them, and it'd be nice to be able to wear them again after the wedding. We'll see what happens there. I'm seeing a lot of new pairs popping up online since this is the season for sandals to start coming back, so hopefully I'll find something soon. Actually, I need to find something soon. I technically should have them before my appointment with the seamstress for my hem on March 29. Pressure!!

I got my veil in from Occansey Designs, and I really like it. It came in really quickly (like less than a week), and I'm impressed with the quality of it. I just haven't had a chance to take any pictures since I took it over to my mom's to hang it in her cedar closet there. I go for my first dress fitting with a seamstress (for a hem and bustle) on March 29 and I'm hoping to get some photos of it then.

Finally, on the dinnerware debate... We made the decision to go with option #2, which was this set from Bed Bath & Beyond:
Anyway, so there you have it... updates on some of my past posts. Wonderfully boring, huh?

Well, tomorrow, hopefully I'll have some hilariously entertaining pre-cana stories to tell.

If not, we'll talk about hair.

Monday, March 3, 2008

DIY Pocketfolds

The wait is over! Here are the DIY pocketfold instructions so many of you have been waiting for. Obviously these same instructions can be adapted to do different size and shape pocketfolds. But here are the basics for how I did them.

For the supplies, you'll have to adjust the amount of things you need based on the number of invitations you are making. I made 130 pocketfolds to be safe--it looks like we only need a little over 100, but I wanted to have plenty of extras for last-minute additions to the guest list, if some got lost in the mail, etc. And of course, we want a couple to keep.

SUPPLIES:
- Custom cut cardstock. For more info on my paper order, click here.


- Paper cutter with a scoring blade (mine is a Fiskars I bought at Michael's)
- Scissors (make sure they are decent ones)
- Bone folder (aka bone/boning tool)
- Adhesive tape (I used Super Tape, 1/8", purchased from Paper Source)
- Pencil

- Flap templates (optional) -- You only need to make these if you want to do the points. This adds more work to the pocketfolds, obviously. Some people just use the straight edge of the paper as it is. Totally up to you. I made these out of scrap paper.

INSTRUCTIONS:
1) Start by scoring your paper where it will need to be folded. I scored my paper at 3" for the pointed flap.
2) Score again for the outside fold (the section you are making is where the invitation will be pasted). I did this at 5 1/8".


3) Make your final score for the pocket itself. I did this at 5".

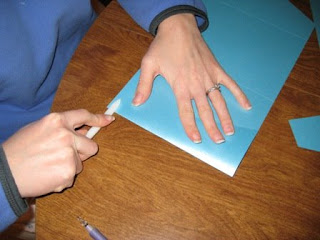
4) Once scored, trace the templates for each end. Here I am tracing the template for the pocket.

5) And here I am tracing the template for the pointed flap.

6) Carefully cut along your pencil lines.


7) Use a bone folder to fold along your scored line to make the pocket.

8) Once you have folded the pocket and you've made a good crease, unfold it again. Add adhesive tape. I had trouble getting my adhesive to stick for an extended period of time. I found that the solution was to put SuperTape on BOTH sides of the paper so that when adhered together, tape is sticking to tape. It gives that extra bond. Here you'll see my SuperTape (the red lines) applied to the four sides of the pocket.

9) Remove the plastic backing from the adhesive tape. In this photo, the red color is gone because I have peeled the backing off the tape.

10) Fold over the pocket to adhere the tape together.

11) I went over my taped sections with a bone folder to make sure everything was stuck together and as flat as it could get.


12) Make your middle fold, using the bone folder to crease the paper.

13) Make the top fold for the flap, again using the bone folder to crease. The bone folder really helps give you flat, neat folds.

14) Fold the whole thing over itself, and tada! Done.


As you can see, this is not a difficult project. However, I have to caution everyone out there--it is EXTREMELY tedious, and definitely much more time consuming than I ever thought they would be. On average, it took me about an hour for every 10 pocketfolds. When you add together all the scoring, tracing, cutting, applying the adhesive, folding, etc. the work does add up. If you're good with paper projects and you have some time on your hands, go for it. If not, do yourself a favor and buy the pocketfolds premade at www.cardsandpockets.com.

Good luck!

Sunday, March 2, 2008

Pocketfolds... COMPLETE!

I had big goals this weekend to get at least two or three projects done. Projects for other brides, that is. I had some bad luck at the craft store on Saturday, though, and couldn't find the paint/ribbon colors I needed. I have to go to a different one this week. Anyway, today I figured that if I couldn't be productive on other people's projects, I should at least be productive on mine.

I spent a good four hours finishing my pocketfolds. But that is it... they are DONE. FINALLY. All 130 of them. I am so relieved, and I'm excited to move onto the next stage of the invitations--I need to print the rest of the inserts and start stamping/embossing. I want to get all of the different components done before doing the assembly all at once. I think it'll be easier that way.

This is what 130 finished pocketfolds looks like:

I can't believe I made each and every one from scratch!

The other good news--I managed to get some photos of the steps to make them. I've had many, many people e-mail and/or leave comments asking for instructions, and I just haven't had the time to put them together. At least I now have the photos. Hopefully I'll get time in the next few days to get the photos uploaded and type out some instructions.

We only have about six weeks until invitations have to go out--it'll be here before we know it. Time to seriously get cracking on these.

Tuesday, February 19, 2008

450 cuts = $4

Last week, we finally printed out our invitations. I designed them in Microsoft Publisher a few months ago. We printed them two to a page, and I knew from the beginning that there was not a chance I was going to cut them all myself. Not just that, but we will have inserts (3-4 per invite) that will need to be cut, too. That's way too much cutting for my little Fiskars to handle. I wanted really clean, straight lines. I also didn't want to spend the HOURS and HOURS it would take to do them all myself.

We have a copy center at work. I called down and asked how much it would cost to cut 75 sheets of paper (for 150 copies of the invitation), and sent a PDF of the document so she could see how many cuts it would take. She got back to me and said $4. I said, DEAL.

So I dropped them off at the copy center downstairs from my office, and picked them up the next morning. And they turned out fantastically. I was a little bit worried handing it off (worried about straight lines, words getting cut off, etc.) but it turned out the slight anxiety was for nothing.

By my calculations, that $4 saved me from making a total of 450 cuts.

Next up: the pocketfold inserts!